
6 Mobile Camera Tips That Actually Make a Difference
May 26, 2025
Introduction
When it comes to mobile photography, most people jump straight into editing apps or fancy filters. But the truth is — if you don’t get the basics of camera handling right, even the best editing won’t fix a shaky, blurry, or badly lit photo.
This post isn’t about getting technical. It’s about everyday habits — small adjustments that help you take sharper, clearer photos with the phone you already have.
Let’s go over six essential tips that anyone can use, starting right now.
1. Keep It Steady — Your Body Is the Tripod
Blurry photo? It’s often because of shaky hands.
Quick fix:
- Hold your phone with both hands.
- Tuck one elbow close to your body.
- If there’s a wall or table nearby, lean on it.
- Gently tap the shutter — don’t jab it.
Bonus tip: If you’re taking landscape or night shots, use a small tripod with a phone holder. Set the 3- or 10-second timer and let the phone take the shot for you.
Bottom line: If your body isn’t steady, your shot won’t be either.
2. Orientation: Vertical Isn’t Always Better
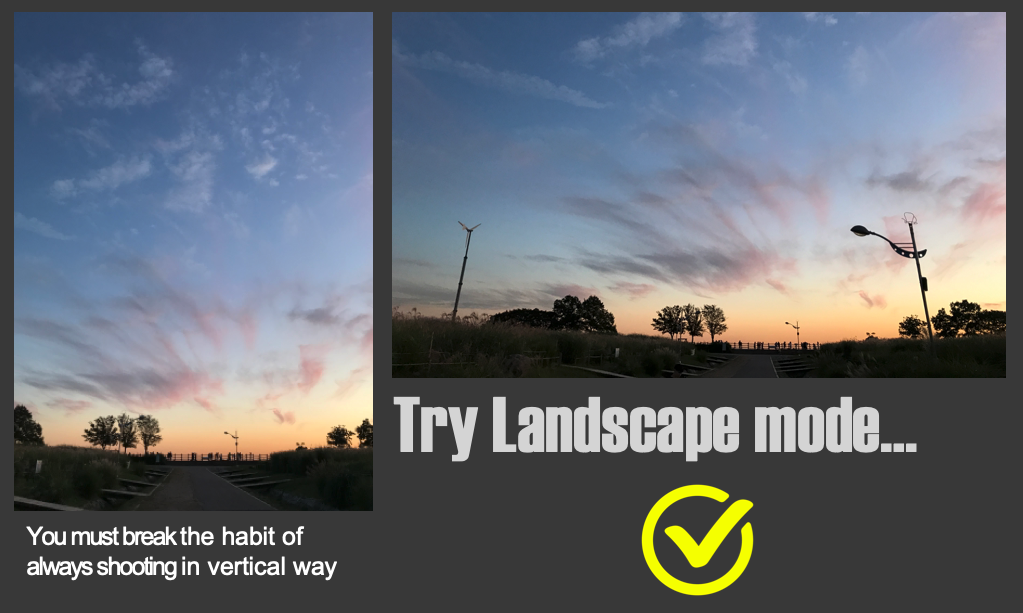
Most of us hold our phones vertically — it’s just natural. But here’s a simple shift: try turning your phone sideways.
Why it works:
- Landscape mode (horizontal) gives a wider field of view.
- Your composition becomes more balanced.
- It’s better suited for slideshows, printing, or cinematic sharing.
Try this: Next time you’re taking a photo of a group, landscape, or anything wide — turn your phone and compare the results.
3. Set the Focus and Exposure Yourself
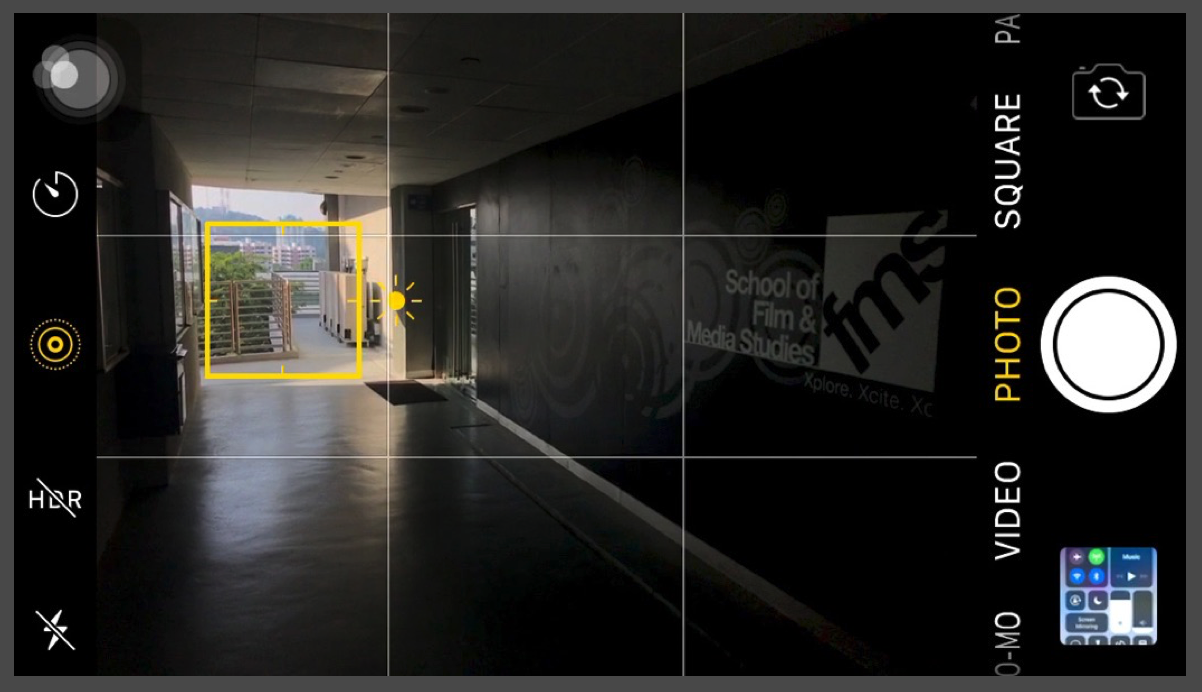

Your camera is smart — but it can’t read your mind.
Do this to set focus and exposure:
- Tap the part of the screen you want in focus.
- Use the sun icon or slider to adjust brightness:
- Slide up to brighten.
- Slide down to avoid overexposed areas.
Think of it like painting with light. You’re not just capturing a scene — you’re shaping how it looks.
4. Use Burst Mode for Fast Moments
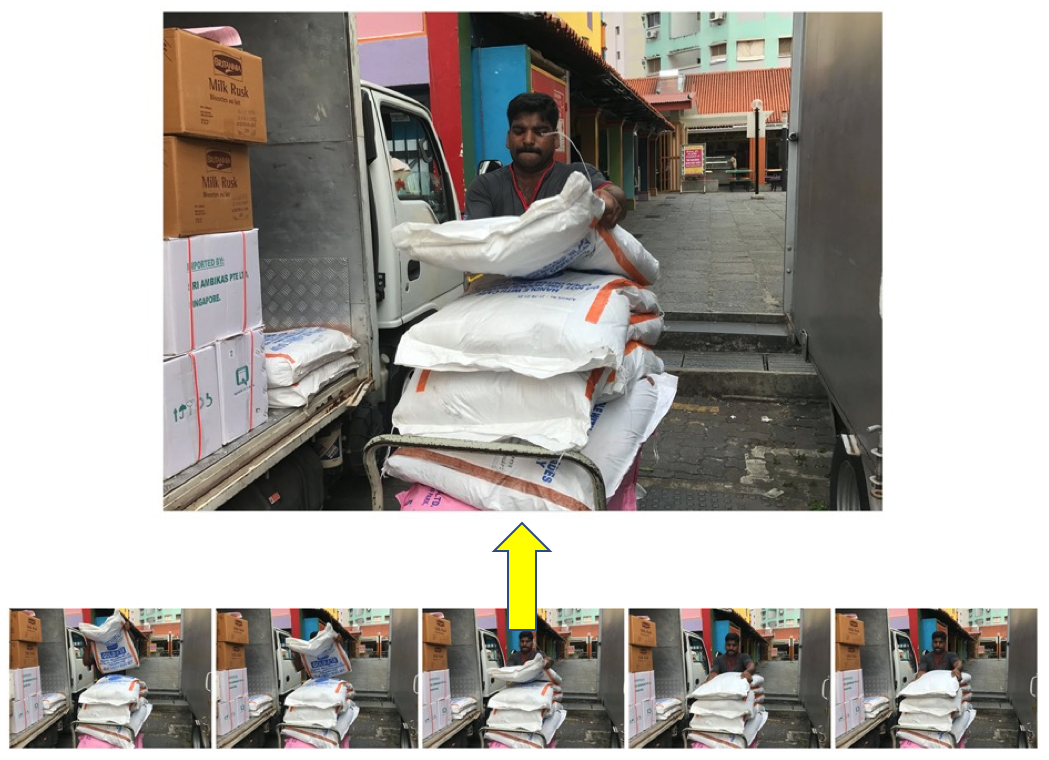
Trying to photograph your kids running, a pet jumping, or a quick reaction? You need Burst Mode.
How it works:
- For iOS, slide the shutter button to the left and hold when the phone is in a vertical position; for Android, slide down.
- Your phone will take multiple photos in a row.
- Later, choose the one that turned out best.
Start just before the action happens, and stop just after. It gives you more chances to get that perfect moment.
5. Try Panorama — The Right Way
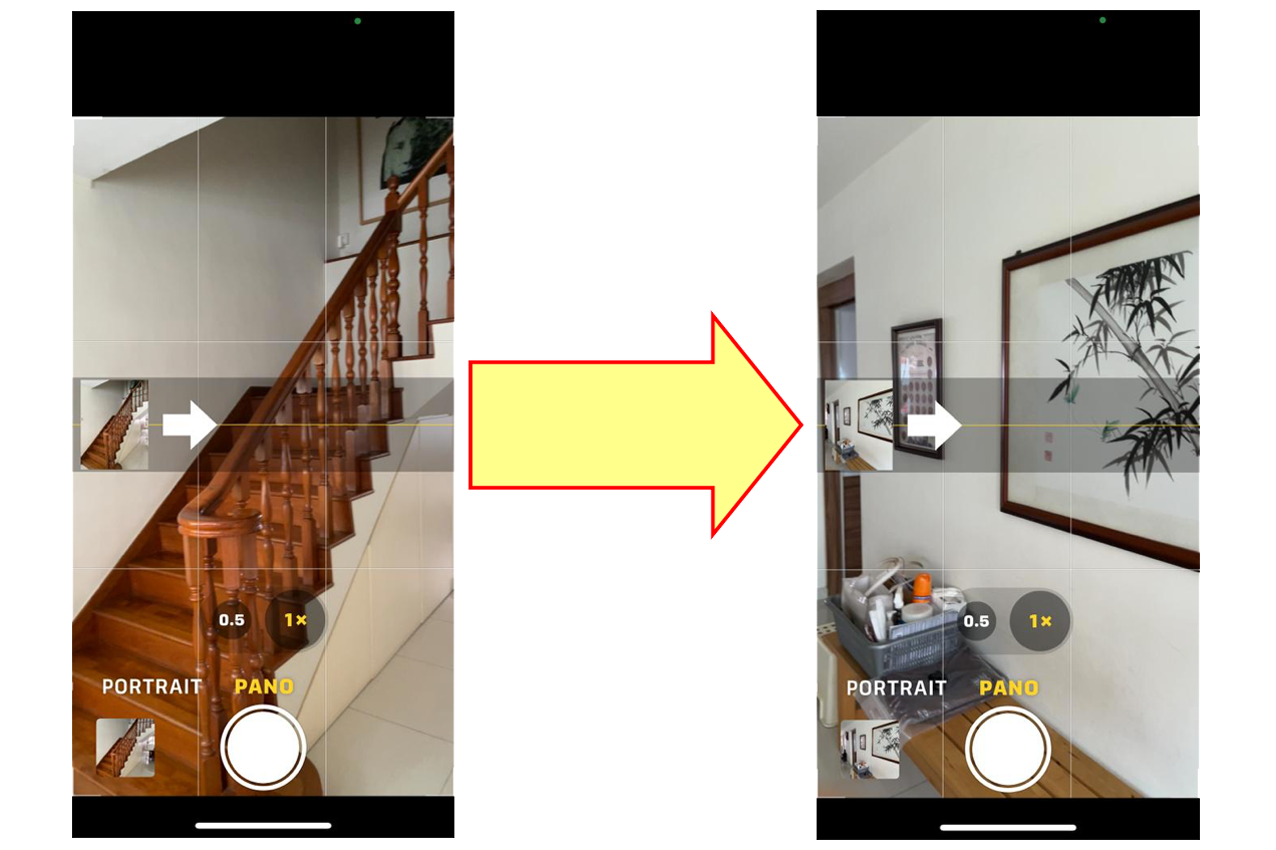
Panorama isn’t just a gimmick. When done well, it tells a bigger story.
Step-by-step:
- Decide on your endpoint.
- Face your feet and shoulders toward that spot.
- Rotate your upper body to the start point.
- Take a breath, exhale slightly.
- Then pan slowly and steadily from start to end — using your torso, not just your arms.
This helps avoid those wobbly, stretched-out distortions.
6. Clean the Lens (Yes, Really)
It sounds too simple to matter, but a dirty lens is the #1 cause of unclear photos.
How to do it right:
- Use a microfiber cloth or any lint-free fabric.
- Wipe gently in small circles.
- Don’t use harsh chemicals.
Most phone lenses are made of hardened glass — they won’t scratch easily unless you use something sharp. So clean regularly, but gently.
Final Recap: Mobile Camera Handling SOP
Here’s your go-to checklist:
- Hold your phone steady — use your body for support
- Use landscape orientation when needed
- Set focus and exposure manually
- Use burst mode for unpredictable moments
- Shoot panorama with your whole body, not just arms. Wider tells better story.
- Wipe your lens before every shoot
None of these tips require a new phone or expensive gear — just better habits. Try them the next time you take a photo, and you’ll see the results immediately.
Better photos aren’t about luck — they’re about small, repeatable steps. Start with how you hold your phone. Everything else builds on that.
Stay connected with news and updates!
Join our mailing list to receive the latest news and updates from our team.
Just enter your EMAIL and NAME...
